As a Canadian, there are a couple of important rules to live by.
One, you have to apologize for pretty much everything. Two, you should always pronounce the last letter of the alphabet as “zed”, not “zee”.
And three, you must love maple syrup.
So when you're trying to make over a Canadian classic, the obvious answer is to make even more Canadian by upgrading it with a whole lotta maple syrup.
Meet the Butter Tart: A Classic Canadian Treat
There are many regional Canadian recipes, but butter tarts seem to be one of the few that are beloved from coast to coast.
If you've never had one before, a butter tart is a small tart with a crisp pastry shell and a filling made of butter, sugar and egg. Think of them as a long-lost relative of the pecan pie, except a little bit sweeter and a whole lot more gooey.
While no one knows exactly where butter tarts were first made or what inspired them, the first known recipes started appearing in print in the early 1900s, the most notable being the the iconic Five Roses cookbook published in 1913. By the 1930s, the butter tart was firmly enshrined in public opinion as a quintessential icon of Canadian cuisine.
And let me tell you, we Canadians take their butter tarts very seriously.
There are dozens of different butter tart festivals where bakers compete for the title best butter tart. And if you happen to miss your nearest festival, you can follow either the butter tart trail or the butter tart tour, both of which allow travelers to go in search of butter tart perfection.
The Great Canadian Butter tart Debate
Everyone agrees on the basic components of a butter tart, but if you want to see Canadians get really riled up, ask them whether a proper butter tart should contain raisins, nuts or neither of the above.
Entire feuds have been fought on the basis of what (if anything) belongs in a buttertart. I'm talking the kind of deep-seated grudges that would rival the Capulets and Montagues, the Hatfields and the McCoys, the Habs and the Leafs, or Wil E Coyote and the Roadrunner.
Personally, I'm a purist, though I have been known to temporarily switch my allegiance from Team Plain to Team Nuts if that's the only option available. But those weirdos on Team Raisin? Sorry, they're just plain nuts. (See what I did there?)
That said, the first known recipe for butter tarts did contain dried currants, so I guess maybe Team Raisin isn't so crazy after all.
The Easier Way to Get Your Butter Tart Fix
Homemade butter tarts are a thing of beauty, but they're rather time-consuming to make.
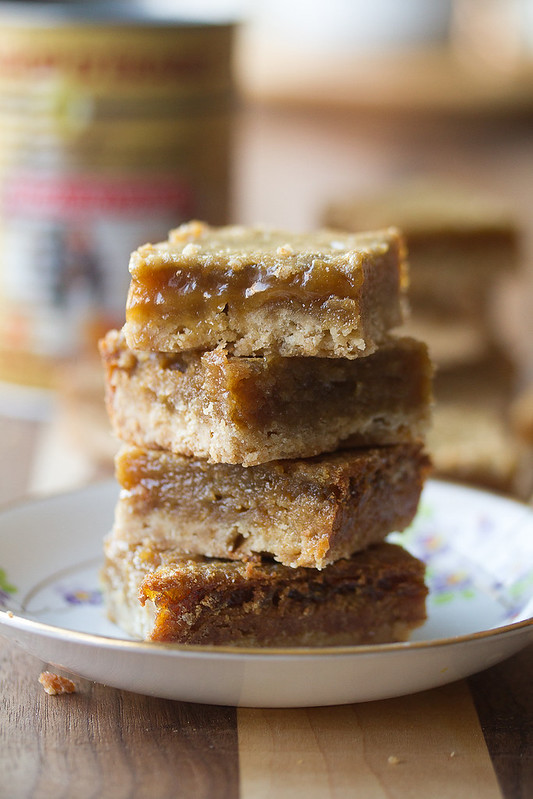
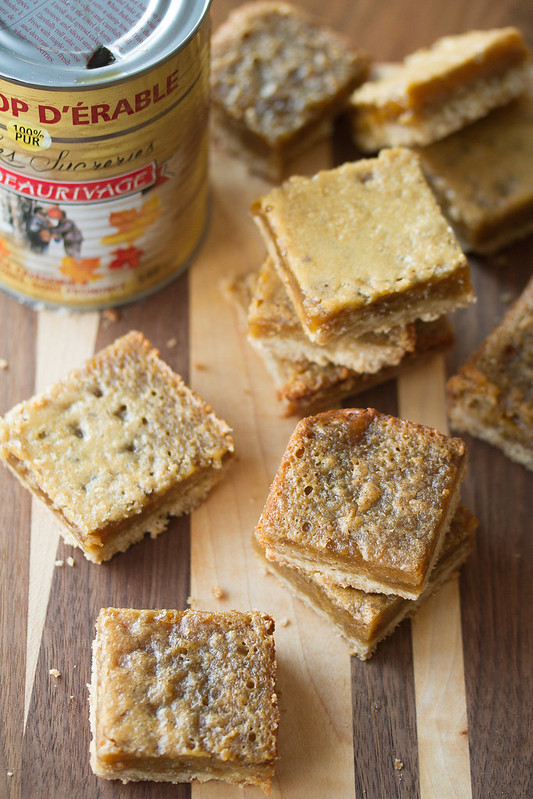
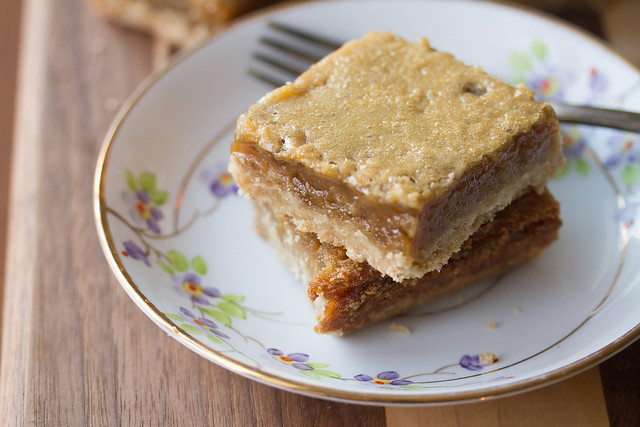
The good news is that with these butter tart bars, you get all the same gooey filling and buttery crust, but with way less effort. They start with a super-simple brown sugar shortbread base, which is topped off which a classic butter tart filling mixture enhanced with a splash of maple.
And even better, they've got everything in the same pan - crispy caramelized edges, softly set sides, and a slightly runny middle. In other words, you can satisfy Team Runny and Team Not-So-Runny with a single batch.
Light, Amber or Dark: Choosing the Right Maple Syrup
Traditionally, butter tarts are sweetened with brown sugar (and occasionally, a dash of corn syrup), but this version goes extra-Canadian with a splash of dark maple syrup.
While you can use any kind of maple syrup to make this recipe, I find it works best when made with dark or very dark maple syrup.
What's the difference? Basically, since 2017, all maple syrup in Canada and the US is classified into four different grades:
- Golden: delicate taste, clear pale gold colour
- Amber: rich taste, amber-brown colour
- Dark: robust taste, auburn-brown colour
- Very Dark: very strong taste, dark chestnut brown colour
All four grades comes from the exact same trees - the only difference is that lighter grades are made with sap from the beginning of the season, while darker grades are produced towards the end of the season when warmer temperatures start changing the sugars in the sap from fructose to glucose.
In my experience, most stores only carry Golden and Amber grades, but I really do recommend taking the time to hunt down the elusive Very Dark grade for this particular recipe.
Its intense flavour is a bit much for pancakes, but it's perfect in baked goods where you want to get a really noticeable maple flavour. (And despite what I just said about pancakes, a drizzle of dark maple syrup on cornmeal-rye pancakes is a thing of beauty.)
//
Print
Maple Butter Tart Bars
- Total Time: 1 hour
- Yield: 16 squares 1x
Description
These gooey bars start with a brown sugar shortbread crust, and top it off with a maple-spiked filling for a sweet treat that delivers all the goodness of a classic Canadian butter tart, only with way less effort!
Ingredients
Pastry:
- 1 ¼ cups flour
- ⅓ cup brown sugar
- ½ cup cold butter, cut into small cubes
Filling:
- 2 tbsp melted butter
- 2 eggs
- ¾ cups packed brown sugar
- ⅓ cup maple syrup (preferably dark)
- 1 tsp salt
- ½ tsp baking powder
- 1 tbsp cider vinegar
- ½ tsp vanilla extract
Instructions
Make the Crust:
- Preheat oven to 350F.
- In a medium-sized bowl, mix the flour and sugar together. Using a pastry cutter or two knives, cut in the butter until you have a fine, crumbly mixture.
- Press the crust mixture into the bottom of a 9-inch non-stick square baking pan. Bake for 15 minutes in preheated oven, or until set and just starting to brown around the edges. Cool completely on a wire rack.
Make the Filling:
- In a medium-sized mixing bowl, whisk the melted butter and eggs until smooth. Add sugar, maple syrup, flour, baking powder, salt, vinegar and vanilla.
- Pour the filling over the cooled crust. Return to the oven and bake 25-30 minutes, or until the filling is set. (It's okay if the middle is just slightly wobbly - it'll firm up as it cools.)
- Set the pan on a wire rack to cool to room temperature. Run a knife along the edges to loosen the filling, then transfer to the refrigerator to chill for at least 1 hour before cutting into squares.
Notes
- How to Cut Perfect Squares: The filling is quite sticky, so make sure to use a non-stick pan and run a knife around the edges to loosen up the filling while it's still warm. Then chill thoroughly before slicing to allow the filling to set up, and rinse your knife in hot water between cuts to keep the edges clean.
- Prep Time: 15 mins
- Cook Time: 45 mins



Lesley W says
Does not look gooey like the picture.
Dry and eggy filling. I used the 2x recipe, did a 8x11 pan. The crust was fine. I reduced the brown sugar a bit but added a full cup instead of 2/3 of maple syrup . No other changes. So dry and it was dark brown by 21 min mark.
Not golden not gooey. I bake a lot.
★★
Isabelle Boucher says
Hi Lesley, I think that reducing the brown sugar might explain why you didn’t get the expected results, since it’s a critical ingredient for the filling, even if you added more maple syrup to compensate. I’d highly suggest making the recipe as directed next time, I promise you it will come out much better.
Becca says
The audacity to leave a 2-star review while admitting you didn’t follow the recipe… rude as hell.
Donna says
Did not have maple syrup on hand so used a combo of molasses and honey. Reduced the sugar and salt a little. Yummy!!
★★★★★
Samantha Beharie says
I made these today and this recipe is incredible!!! I used white vinegar instead of cider vinegar but didn't find anything that threw me off taste wise.
I baked the crust a bit longer than I should have but the crunch of the crust layer ended up pairing extremely well with the gooey centre. Absolutely stellar. Did not find any issues either the measurements or ingredients.
Angela says
I can't wait to make these for my daughter's wedding.
Question: If I double the recipe, should I use a 9 x 13 pan?
★★★★★
Isabelle Boucher says
Great question, Angela. You can definitely double this recipe in a 9x13 pan, but the filling may need a little extra time in the oven to make up for the larger surface area. I would still set the time for 30 minutes to be on the safe side, but be prepared to add another 5-10 minutes if it's not done. You want the filling to look mostly set in the middle - surface should be dry, and it should only have a very slight jiggle in you poke it. If it still looks very liquid, keep baking!
Doug Binns says
Delicious, thank you very much for posting this recipe, however, suggest some mod's
use 1/2 - 2/3 amounts for the crust base. Too much crust to the amount of filling - my personal preference
a bit salty - I will use 2/3 tsp salt in the filling next time.
I will add a bit more vanilla
eggs at room temp so the butter blends in better on the filling.
Excellent recipe and super easy as I used the food processor on pulse for the crust and on full whack for the filling.
★★★★★
Isabelle Boucher says
Thanks for sharing your feedback, Doug. The food processor trick is genius! I find the salt helps to offset the sweetness of the filling, but it is definitely a personal preference.
HL says
I made these tonight and OMG soooo gooooood - and incredibly easy!!!
★★★★★
Bernice Hill says
ooooh, these bars. I can already feel the Maple syrup coursing through my veins.
★★★★★
NANCY WU says
totally making this this weekend!!
★★★★★
Vanessa says
I am so making these for Canada Day!!!
★★★★★
Shailaja Desai says
Perfect treat...looks delicious!!