It's always nice when things come together as they should. For example, take this sausage-making party... we'd been plotting for months to have some friends over to spend an afternoon making homemade sausage, followed by a big celebratory meal featuring our very own freshly-made sausages.
By sheer luck, it turned out the date we had picked was also the date for Foodbuzz's 24x24, a monthly worldwide event where 24 Featured Publishers each host a fun food-based event within the same 24-hour period. I put together a quick pitch (which essentially boiled down to "my friends and I want to make lots of sausages and then eat them"), and was absolutely ecstatic when I got a note a few days later letting me know I'd been selected as one of the lucky twenty-four.
Cue the happy dance.
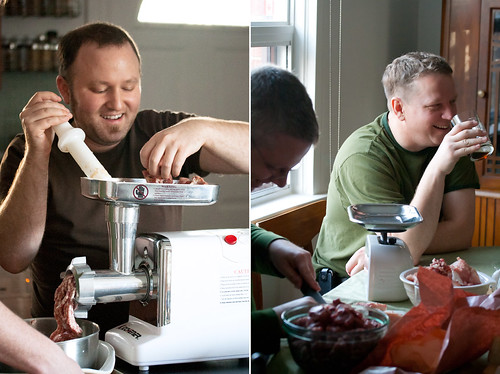
So, what happens when you get five food-obsessed people together with a few pounds of meat, some sausage casings and a meat grinder? Why, an epic meal and lots and lots of homemade sausage, of course!
~
The Menu:
Starters:
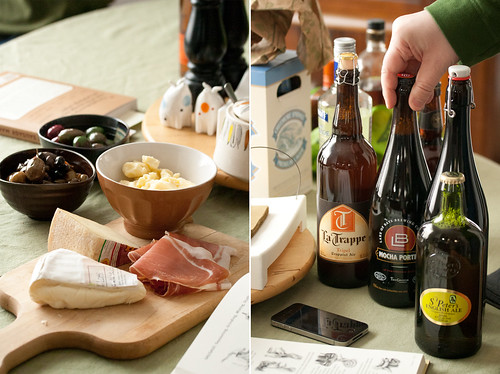
Cheese and Charcuterie Board
Roasted Marrow Bones with Smoked Salt & Parsley Salad
(recipe)
Drinks:
Assorted Microbrew Beers
Main:
Homemade Sausages!
(recipe below)
Sides:
Crash Hot Potatoes
(recipe)
Balsamic Roasted Carrots
(recipe)
Shaved Celery Root and Fennel Salad
Dessert:
Blood Orange Tart
(recipe)
~
The recipe for our homemade pork Luganega sausage is further down. I'll be posting recipes for the remaining menu items, including a lamb and rosemary sausage, over the next few posts - links will be added to the menu as they become available.
Before we get to the epic meal, however, there are sausage to be made! Homemade fresh sausage is actually fairly easy to make, as long as you have the right equipment and the necessary ingredients. Here's how...
Sausage-Making 101:
Step 1: Stock Up
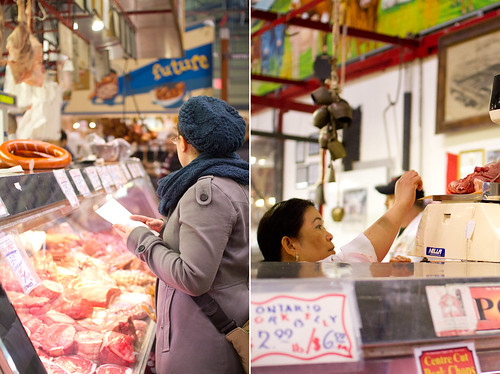
First things first - pick up all of the ingredients and supplies . If you're going to go through all the trouble of making your own sausage, you may as well go the extra mile and pick up fresh, good-quality meat from your friendly neighbourhood butcher. (It's probably a good idea to call ahead and make sure they have what you need, BTW - some butchers may not always have sausage casings on hand.)
We made two kinds of sausage for our party (one pork-based and one lamb-based), so we picked up a pork shoulder roast, a boneless lamb roast, some pork fat and sausage casings.
Equipment-wise, you'll also need a meat grinder, a sausage stuffer, a stand mixer and two large mixing bowls.
Our meat grinder doubles as a stuffer, which makes things just that much easier, but you could also go low-tech and use hand-crank meat grinder and a pastry bag with a wide tip to stuff the casings (that said, having tried this method before, I really don't recommend it... it's messy and labourious, and totally justifies the ~$130 you'll pay for a decent grinder/stuffer).
Step 2: Casings
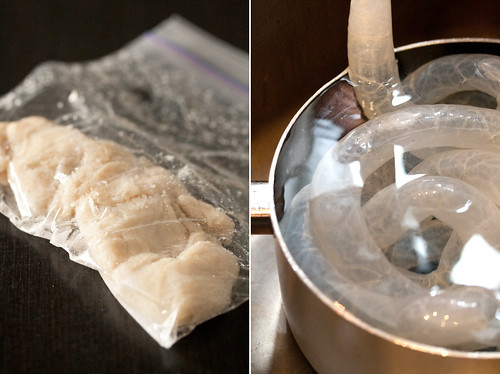
Sausage casings often come packed in salt - if that's what you have, rinse your casings with cold water to remove most of the salt, then soak them in a large bowl of cool water for half an hour to soften them up.
After half an hour, flush out the casings with cold running water, by holding one end of the casing under the faucet. The casing should slowly begin to fill with water - as it does, check for any leaks that might spring up along the length, which would indicate a tear in the casing. (If you do find a tear, simply cut out that portion of the casing.) At this point, your casings are ready to use. Simply leave them submerged in cool water until you're ready to stuff.
Step 3: The Big Chill
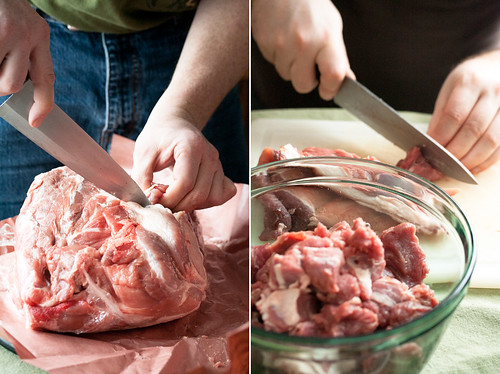
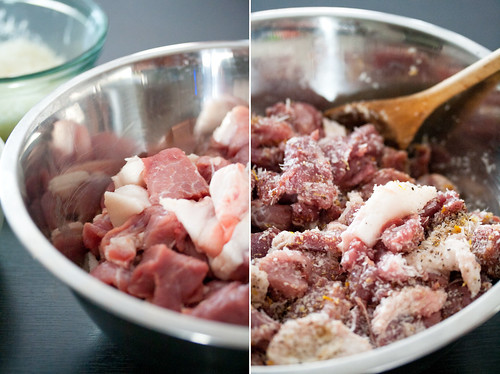
While your casings are soaking, cut the meat and fat into small cubes, trimming off any gristle, tendons or silverskin. Mix the chopped meat and fat with the seasonings, then place in the freezer to chill for 30 minute to an hour, or until the meat feels quite firm but not entirely frozen (either throw the whole bowl in there, or transfer into a large zip-top bag if freezer space is at a premium). While you're at it, throw the cutting disc and metal attachments for your meat grinder into the freezer too.
Cold is your friend when you're making sausages. It helps the fat grind up into nice cohesive chunks, which is critical for getting that fat-speckled appearance that makes for a perfect sausage - if the meat and fat are too warm going into the grinder, the fat may smear or separate, which will result in a crumbly sausage. It also ensures the meat stays within a safe temperature range, so that you don't run the risk of spoiled meat.
Step 4: Bump n' Grind
Once the meat is well chilled, assemble the grinder, and place your stand mixer bowl in a larger bowl filled with ice (again, to make sure the meat stays as cold as possible).
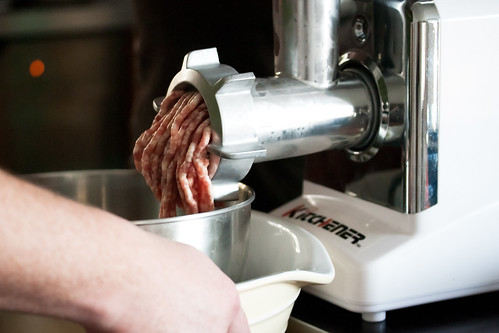
Slowly push meat and fat chunks through the feed tube and into the grinder - don't push too hard; it's best to let the grinder do most of the work.
As the meat comes out of the grinder, check to make sure it has a speckled appearance, with a distinct separation between the pink meat and white fat. If it begins to look smeared or blurred, stop the grinder and clean off the die and the cutting blade - most often, this is caused by a piece of gristle that's gummed up the works.
Step 5: Binding Terms
Once you've ground up all the meat, it's time to bind the filling - essentially, that's what gives the sausage meat its distinctive texture, and evenly distributes the meat and fat throughout.
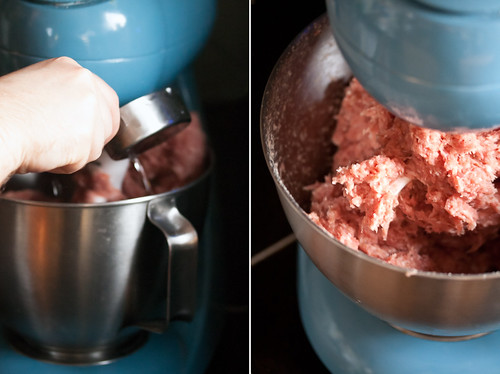
Using your stand mixer and a paddle attachment (or good ol' elbow grease and a wooden spoon), starting mixing the ground meat on low speed. If your recipe contains liquid, you should add it at this point (making sure it's well chilled) - slowly drizzle it in, stirring as you go, until it's completely incorporated into the meat. Mix for about a minute and a half to two minutes, or until the meat feels slightly tacky and has a "furry" texture.
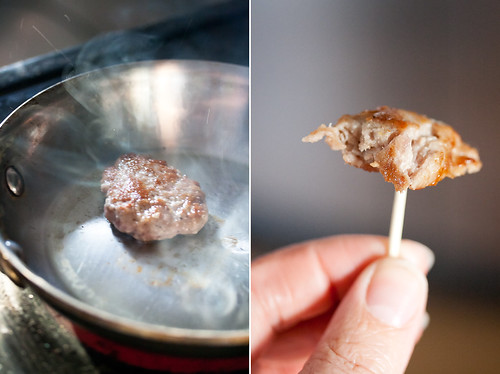
Before you move on, do a quick taste test by pan-frying a small piece of sausage meat, and adjust the seasoning with more salt or spices if required.
Step 6: Stuffing Time
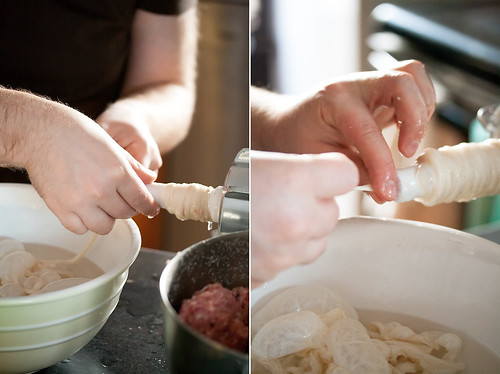
Thread the casings onto the stuffing tube. Resist the urge to make off-colour jokes about what it looks like... or don't, if you're anything like me. Snickering like a grade-schooler is an acceptable alternative.
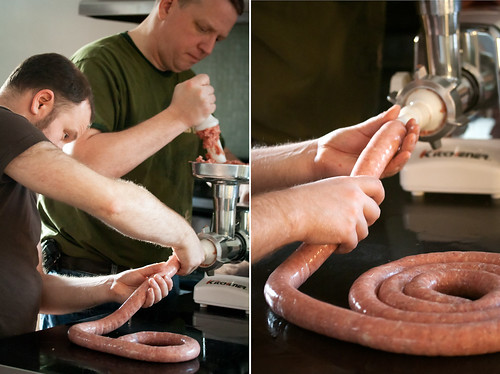
Start stuffing the sausage filling into the casings. This is best done as a two person job, with one person pushing the stuffing into the feed tube, while the other one holds the casing to control how fast it slides off the tube. Again, don't push too hard or rush the process - you want to ensure that the sausage filling is being packed in consistently, and that you're not creating too many air bubbles.
Once you're done, tie off the end with a knot and trim off any excess casing. Using a sterilized needle, prick any air bubbles that may have been trapped in the sausage to remove them.
Step 7: Do the Twist
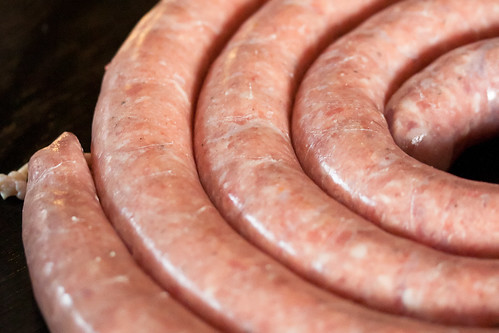
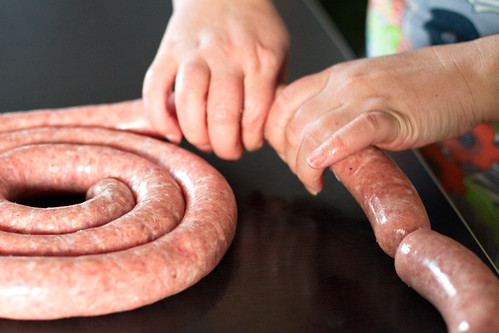
To make links, gather about 6-8 inches of sausage, and twist each one three to four times to create a tight seal. Arrange the sausages on wooden dowels, and let air-dry for about 30 minutes in a cool environment or until the casing is dry to the touch.
Once the sausages are dry, they're ready to be eaten. Otherwise, refrigerate or freeze the sausages immediately until you're ready to use them - they'll keep in the refrigerator for 1-2 days, or for several months in the freezer.
Step 6: Party Time!
Cook the finished sausages however you like - my personal preference is to throw them on the BBQ, but since it's much too cold for that this time of year, we settled for poaching in boiling water for 10 minutes or until the sausages cook through, followed by a quick sear to get the outsides nicely browned.
Disclosure: This post was created for the Foodbuzz 24x24 series. I received compensation from Foodbuzz for this post, including a stipend to cover the costs of hosting my event. All opinions (and snide comments) are entirely my own.
//
- 4 feet natural sausage casing
- 4 lbs fatty pork shoulder
- 1 cup grated Parmesan
- 1½ tsp kosher salt
- 1 tsp grated lemon zest
- 1 tsp grated orange zest
- 1 tsp fresh ground black pepper
- 1 tsp ground coriander seed
- ½ tsp fresh grated nutmeg
- 2 cloves garlic, minced
- ½ cup dry vermouth
- Place the casings in a large bowl of water to soak.
- Cut the pork shoulder into 1" cubes, trimming off gristle, bone and silverskin.
- In a large mixing bowl, combine the pork with Parmesan, salt, citrus zest, pepper, coriander, nutmeg and garlic, and mix until the meat is well-coated with seasonings. Chill for at least 30 minutes in the freezer, or until meat and fat feel fairly firm to the touch.
- Using the fine die, grind the meat into a stand mixer bowl which has been set into a large bowl of ice water.
- Using a stand mixer fitted with a paddle attachment, mix the sausage meat on low speed. Slowly pour in the vermouth while mixing, and continue for about 2 minutes, or until the liquid is completely incorporated. The sausage filling should feel slightly sticky to the touch.
- Pan-fry a small test piece of sausage meat and adjust seasoning if necessary.
- Slip the soaked and cleaned casings onto the feed tube for your sausage stuffer. Stuff the sausage filling into the casings, being careful not to overfill or to create too many air pockets as you go.
- Using a sterilized needle, prick any air pockets that may have gotten trapped inside the sausage. then twist into 8" to 10" links. Drape the links on wooden dowels to dry for 30 minutes, then transfer to the refrigerator until ready to eat. Sausages will keep for up to 3 days, or in the freezer for up to 6 months.
- To cook, broil or poach the sausages for 20-25 minutes or until firm and cooked all the way through.





visda says
Wow! What a thorough tutorial. I have only consumed when friends make sausage but your post is totally tempting that makes me want to make them myself. I just have no equipment. Probably should try it by a friend. Thanks for sharing the great experience.
PolaM says
that looks like great sausage!
Dara says
LOVE THIS. I have always wanted to make my own sausage - I am so impressed you threw a party. I am loving your blog.
Mardi@eatlivetravelwrite says
Sausage making, as was evidenced by my many efforts last year for Charcutepalooza, is indeed, much better with friends. What a party!!
Samantha says
Isabelle, what a wonderful post! I've been wanting to delve into homemade sausage for a while, but keep getting cold feet. But what a wonderful thing to be able to pair with my husband's home brews! Thanks for sharing!
bellini says
I would love to learn to make my own sausages. A local restaurant offered a class last fall but sad to say I was working.
JehanP says
Very nice post, and I love the menu! Hats off to you for making your own sausage.
Baker Street says
Congrats!
Loved your step by step pictures! Superb post!
Anne@FromMySweetHeart says
Wow Isabelle! You guys are sausage pros! That is so impressive! It looks like so much work, but when you have friends pitching in and really good beer....I bet it was so much fun! I am really looking forward to all the recipes that come from this party! And congrats on being selected by Foodbuzz....that is really cool! : )
Isabelle says
Thanks for the kind words, Anne, but I'm pretty sure we're still at the "really enthusiastic amateur" level when it comes to this sausage business. :) And yes, beer definitely makes the job that much more enjoyable!
Kita says
You know I have been looking forward do this since you mentioned it. I love the idea of a sausage making party - though I doubt I have any friends tough enough to take on the task. They would all run in fear at the mention of casings. Which is a shame because it looks like you had a blast. Best 24x24 event ever.
Isabelle says
If it makes you feel any better, Kita, none of our friends were interested in dealing with the casing either.
I don't find the salted medium-sized casings all that gross, actually, but I've heard the bigger casings (oh-so-poetically called "bung") are pretty foul... one of the many reasons I've never dared to make bigger sausages like mortadella. :)
Kiri W. says
This sounds like such an awesome event! :) I've never made sausage (me! A native German! Shame on me!) and this would seem like an amazing way to get messy and produce tasty stuff. Awesome 24x24!
Magic of Spice says
Congrats on a fantastic 24x24...such a fun idea!
I remember as a child my aunt doing this in her kitchen, and although I did not eat meat...loved to help :)
Jackie Gordon Singing Chef says
Ahhh... now I see what you were up to!
This looks like a ton of fun. Love the Crash Potatoes recipe! I have to host a dumpling making party soon. Having some volunteers come and clean up the mess in order to learn would be a good idea too. When cooking and drinking I enjoy being able to pass out without repercussions!
Great post,
Jackie
Isabelle says
Thanks, Jackie! The Crash Hot Potatoes are a pretty regular menu item at my house... they're so much better than regular roasted potatoes (I'm a sucker for those crispy potato bits).
Sadly, the kitchen elves didn't visit me overnight to tidy up... maybe I should've included a photo of the giant pile of dishes we had to deal with the next morning! :)
Annie Oakley's Kitchen says
That looks like it was so much fun! It makes me want to get a grinder attachment for my Kitchen Aid. Congrats on a great 24 x 24!
Isabelle says
Oh yes, you absolutely should splurge on the grinder attachment for the KA!
It's worth it, and not just for sausages... we use ours to make fresh ground beef for burgers sometimes, which is miles better than the pre-ground stuff from the supermarket.
Jen @ Juanita's Cocina says
This is my favorite 24 event that I've seen thus far!
We made sausage and the results were AMAZING.
Plus, it was sorta fun. Who doesn't want to play with their food?
George from GreekCulinary.com says
Man that looked like fun! Great Post!
Isabelle says
Thanks, George! We definitely had a blast doing this post. :)
Kimmy @ Lighter and Local says
As I've learned from my charcutepalooza days.... I loved making sausage, but the cleanup of all the parts of the grinder was so daunting, it made me question whether I'd ever do it regularly.
I should just do big batches one a year or something...
Isabelle says
Yeah, the cleanup is a bit of a pain in the butt, which is why sausage-making is a once-in-a-while thing at our house. Also, we don't eat THAT much sausage between the two of us, so even a small batch will last us a couple of months. :)
That said, totally worth the hassle if you're making a really large batch, especially since it's not that much more effort to double or triple a recipe.
Tina "The Wandering Eater" says
Damn, my 24x24 event pales by comparison to yours! (Mine's sound like rabbit food now.)
Now, I want to throw a sausage party now.
Eliot says
I love it! It's a sausage-palooza! Great party. I am sending this on to my brother-in-law who is the sausage maker in the family.
Georgia @ The Comfort of Cooking says
What a fun project, Isabelle! Thanks for all the tips and the great recipe. This looks like something I'll definitely be trying in the near future.
Mireia says
Looks amazing!! Do I spot spanish jam right there?? I hope it's not Italian! The sausages look amazing!
Isabelle says
Sorry to disappoint, Mireia, but that is indeed an Italian prosciutto... though I do prefer the Spanish jamon iberico, the shop where we bought our cheese, olives and charcuterie didn't have any available. (A tragedy, I know!)
Christina says
Wow great job on the sausages! what a great party, I'm sure everyone had a blast. And as usual, the pictures are amazing and I'm sure there are tons of people looking at them and wishing they had a plate of sausages near them :)
Isabelle says
Thanks, Christina! We got super-lucky with the weather, thankfully... it was a cloudy morning, but then the sky cleared and the sun popped out just as we were getting ready to grind the meat. Photos always come out so much better when there's great light! :)
Olga @ MangoTomato says
Isabelle, what an awesome 24 event!!! Creative, successful and so fun.
Congrats.